Showing posts with label handmade gift. Show all posts

Thursday, May 13, 2010

It's a Bird, It's a Plane...


It's Superman!  This is the first of the sewing projects from my list that I completed.  It's so far from perfect it's laughable, but it's done.  I've had the fabric for almost 6 months, so done and imperfect is better than still sitting in neat little bundles in my sewing room.

Superman (who refers to himself as Supaman, has no idea who Superman and Batman are, and will STRONGLY deny being Batman; both sides of the cape are Superman and that's it!) could take it or leave it.  I actually had to bribe him to get him to wear it long enough to get a couple pics.  But that's ok, he'll like it more when he's a bit older.

I used this tutorial, that I've had bookmarked in my sewing folder for ever and ever.  It was very easy to do and I think that the next one I do will be much better.  Oh, yes, there will be another one.  I think all of my children need capes.  And I probably need one, too!  They would make great additions to Halloween costumes!


If you look closely you'll see that the fabric around the logos is puckered and that my applique stitching is horrendous.  Next time I think I'll just straight stitch near the edge of the felt and call it good.  I actually think that look appeals to me more, anyway.  I tried a plain ol' zigzag and didn't like it, so I switched to my machine's applique stitch with the feed dogs down.  Talk about a learning curve!  Whew, it was a lot of work and more than a little frustrating.  Not at all worth the crooked-y results.  Oh, and a little stablizer probably wouldn't come amiss, either.


The bribery I mentioned.  "You can throw rocks in the pond if you'll leave this on for a minute!"

One final note in regards to Superman's appearance:  Yes, he had chocolate chip pancakes for breakfast (whole wheat, though, that makes it healthy, right?!) and I didn't wash his face.  Yes, the side of his face is covered in dirt because he fell down.  No, I didn't pick out his outfit.  Big Sissy did, and that t-shirt is Baby T's.  The shorts were a gift from Aunt Gigi, and when I told him who got them for him, he said that makes him happy. :)  So, thanks, Aunt Gigi! 

Friday, March 26, 2010

The Quest for a Pretty Burp Rag

My first baby didn't really spit up.  Baby number two spit up for a very short amount of time, until we figured out his dairy sensitivity.  Three, as we affectionately referred to him in utero, spits up a LOT.  After a couple of months of wearing soft, practical, and super absorbent cotton prefold diapers on my shoulder all day enough was enough.  I mean, I was using those things out in public, everywhere.  Not so pretty.  I had a few of those thin baby terry burp cloths, but, really?  Useless.

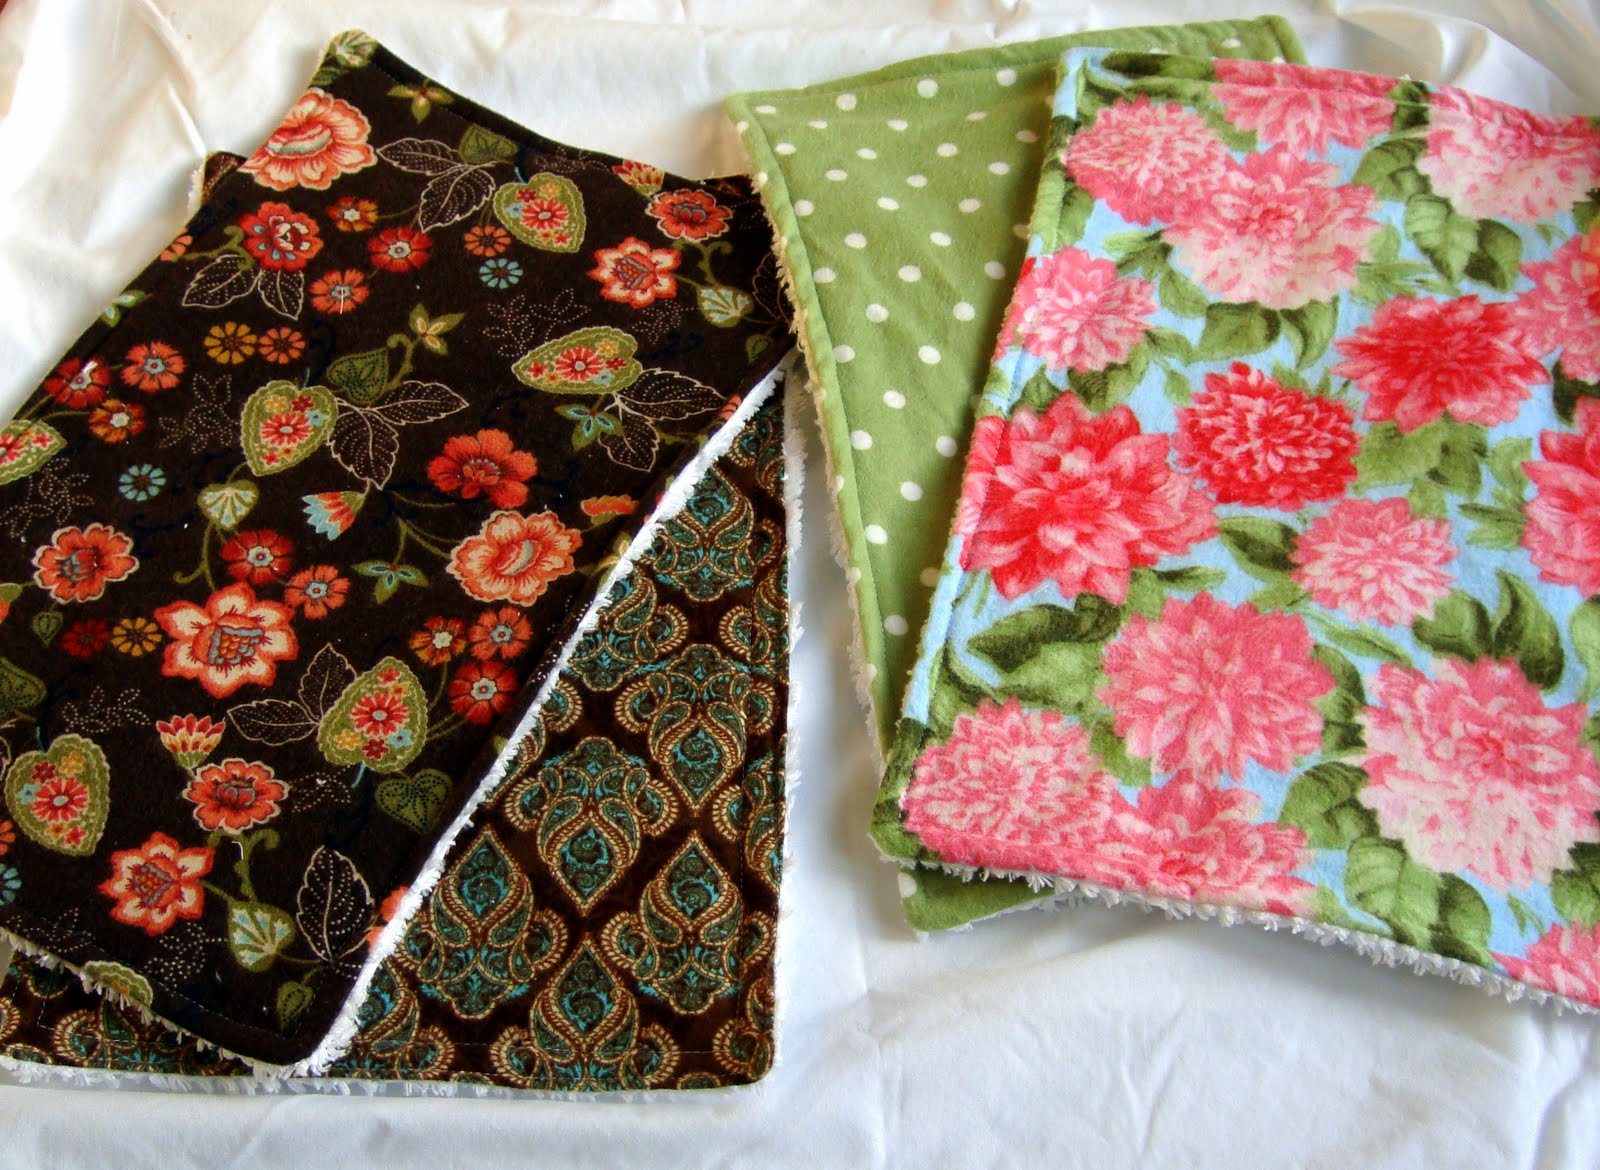
So, one day I bought some cotton chenille and flannel and these were the result.


They were a big step up.  Soft and absorbent and not diapers.  However, maybe I'm weird, but I am just so tired of pastels and baby prints.  They're cute on babies, but I'm not a baby and I'm the one wearing the darn thing 24/7, right?

So, back I go and this time I picked up some fresh white chenille and some pretty quilter flannel.  The quilter flannel is very soft and smooth and came in prints that appealed to me much more.


Now I'm happy.  These are functional and pretty.  And I need all the pretty I can get in this nose- and bottom-wiping, sleep-lacking, crazy wonderful season of life.

Thursday, March 18, 2010

More Baby Shoes

I made a couple more pairs of baby shoes this week.  The first pair is for Baby T. 

I'm not really crazy about them.  The fabrics "go" together nicely, but I wish I'd put the contrasting fabric on the soles, instead of the heels.  I fully lined these with white minkee, so they are nice and soft.  And, the toe and sole fabric is a super cute Buffalo Bill word print that is just right for my little cowboy.  Oh well, they'll keep his feet warm for the next few chilly months, anyway.  Oh, and you see how there's just one in the picture?  Wonder where his mate is?  Me, too.  I. don't. know.  He'll turn up, eventually... 

This next pair is for some friends who recently had a baby.  They are a 6-9ish month size and should fit the baby in the summer months, so I used a cute little crab print.  On these ones I lined the soles with minkee and used the contrasting fabric on the outer soles and inner lining.  Much better!  I'm wishing I'd stuffed the shoes with tissue or chunky baby feet for the pics now, but you get the idea.


I've also been tweaking the pattern and I'm starting to be happy with it. It needs a bit more, but I'm definitely getting close.  The first pair of shoes I made were fine, but I've been enjoying the creative process of making the pattern mine.  Not to mention adding to Baby's shoe wardrobe. 

I'm making a couple of burp rags to go along with the shoe gift, I'll share those next.

Monday, March 8, 2010

Pinecone Bird Feeders

Here's a quick little project for little or big hands.  My kids love to do this and it's super simple.  The only downfall is that the cleanup can take longer than the project. 

We gathered these pinecones from my grandma's yard last year.  Kids love pinecones, mine are always bringing me special ones.


Spread the pinecones with a generous amount of peanut butter.  I think little spatulas might be easier for the little hands, but we used butter knives. 


Once the pincones are mostly covered with the peanut butter roll them in birdseed.  Press down to pack the seeds into the peanut butter.


Tie a string of some sort around the pinecone.  We used twine, but you could also use fishing line, floss, or even ribbon.

Hang the feeders outside and wait for birdies.  The weather's so nice right now they're not very interested, but, as one of my friends pointed out, April is the new December here lately, so I'm sure we'll have some takers soon.


Tuesday, February 23, 2010

Pretty Heating Pads


(old person voice) "I have an achin' in my bones!"

It's true.  My husband likes to joke about his "arthritic wife", and I don't mind at all because it makes light of a situation that could easily become depressing.  I developed arthritis about 6 weeks after the birth of my last baby, and am still waiting for a diagnosis.  In the mean time, though, I started making these rice bags to help the discomfort.  

I made my first one for my sweet girl, who had a tummy ache one night.  She slept so well after I gave her one of our old ones that I knew I was on to something.  But, she complained about the smell, so I made her a new one and scented the rice with essential oil to disguise the hot rice smell.  Now I use these little babies whenever my kids are having a hard time falling asleep and they work like magic.

First, if you want your bag to be scented, dump the rice into a bowl and sprinkle with a few drops of essential oil and stir.  I used lavender and a 2 pound bag of rice for each bag.  You want to make sure that the bowl and utensils you use won't absorb the oil or are ones you don't plan to cook with.  Let sit.

Next, cut the material you plan to use for the bag into the basic shape of bag you want.  The possibilities are endless.  I like to use old cotton clothing like t-shirts, jeans, or socks. 

These are about 10 inches by 10 inches.  I sewed the edges closed, leaving a 3 inch gap for inserting the canning funnel I used for adding the rice.  Then, I sewed them closed.
This is one from an old tube sock.  I added a few stitches to the center of it before filling to keep the rice evenly distributed.  Then I just sewed the top closed after filling.


Finally, I made very simple pillow cases that overlapped by a few inches in the back.  I wanted to be able to remove the bag and wash the case or to be able to replace the bag at some point.  Can you tell the boys' room has a western theme?

This one is for me.  Again, I just sewed a case a few inches taller and wider than the sock with some fabrics that made me happy.

In my microwave, the 2 pound bags take about 1 minute 15 second to be the right temperature for the kids and about 1 minute 30 seconds for me.  I mix the bag around to make sure that all the hot spots get distributed.  Of course, use common sense and start out with no more than a minute until you get a feel for your microwave.  And, for pete's sake, don't burn down your house or something.

Enjoy!


DIY Day @ ASPTL

LinkWithin

Related Posts with Thumbnails