Sunday, February 28, 2010

Crochet for my baby

I made this in the car.  The hat, not the baby, silly.  This is the fourth hat I've crocheted.  The other three I made last summer to keep myself busy during bedrest. 

The one I had made for baby T earlier was from a baby yarn, and I wanted him to have one that matched his siblings' hats.

I think he likes it.  Doesn't it match his eyes well?
I was sorting through my yarn recently and realized that I have about 10 shades of blue yarn.  And that's all, no other colors.  Crazy, huh? 
I like blue. Blue is my signature color.
I've seen Steel Magnolias a couple of times...

Friday, February 26, 2010

Ski Trip!


This is a picture of the first time we took our big girl skiing two years ago.  We all love to ski.  When she got the winning side of the wishbone on Thanksgiving her wish was to go skiing.  We went a few weeks ago, and again on Wednesday.  But I forgot my camera, hence the old pic!

For the first time we got her a lesson.  And, after a one hour lesson, our not quite four year old skied completely on her own for the first time.  Not just the bunny hill, either, but the actual ski runs.  It was awesome and the best time I have ever had skiing.

We took our big guy, too, and he loves it.  And, we took my awesome mother-in-law who kindly held the baby in the lodge so we could all ski.  I am so looking forward to the day when Hubby and I are skiing down the slopes surrounded by a swarm of our skiing children. 

I'm sharing this with you for two reasons.  The first is that I'm super proud, of course, and skiing is one of our favorite family activities. 

The other is that I've been meaning to share another quickie project with you, but the whole packing and unpacking that is a part of taking a 3 year old, 2 year old, and 5 month old out for the day, not to mention all the necessities needed for a day of skiing, has thrown my schedule off.  So, don't worry (I know you were distraught!), I'll be showing you something later today or tomorrow.

For now, though, what are your favorite family activities?

Tuesday, February 23, 2010

Pretty Heating Pads


(old person voice) "I have an achin' in my bones!"

It's true.  My husband likes to joke about his "arthritic wife", and I don't mind at all because it makes light of a situation that could easily become depressing.  I developed arthritis about 6 weeks after the birth of my last baby, and am still waiting for a diagnosis.  In the mean time, though, I started making these rice bags to help the discomfort.  

I made my first one for my sweet girl, who had a tummy ache one night.  She slept so well after I gave her one of our old ones that I knew I was on to something.  But, she complained about the smell, so I made her a new one and scented the rice with essential oil to disguise the hot rice smell.  Now I use these little babies whenever my kids are having a hard time falling asleep and they work like magic.

First, if you want your bag to be scented, dump the rice into a bowl and sprinkle with a few drops of essential oil and stir.  I used lavender and a 2 pound bag of rice for each bag.  You want to make sure that the bowl and utensils you use won't absorb the oil or are ones you don't plan to cook with.  Let sit.

Next, cut the material you plan to use for the bag into the basic shape of bag you want.  The possibilities are endless.  I like to use old cotton clothing like t-shirts, jeans, or socks. 

These are about 10 inches by 10 inches.  I sewed the edges closed, leaving a 3 inch gap for inserting the canning funnel I used for adding the rice.  Then, I sewed them closed.
This is one from an old tube sock.  I added a few stitches to the center of it before filling to keep the rice evenly distributed.  Then I just sewed the top closed after filling.


Finally, I made very simple pillow cases that overlapped by a few inches in the back.  I wanted to be able to remove the bag and wash the case or to be able to replace the bag at some point.  Can you tell the boys' room has a western theme?

This one is for me.  Again, I just sewed a case a few inches taller and wider than the sock with some fabrics that made me happy.

In my microwave, the 2 pound bags take about 1 minute 15 second to be the right temperature for the kids and about 1 minute 30 seconds for me.  I mix the bag around to make sure that all the hot spots get distributed.  Of course, use common sense and start out with no more than a minute until you get a feel for your microwave.  And, for pete's sake, don't burn down your house or something.

Enjoy!


DIY Day @ ASPTL

Monday, February 22, 2010

Breakfast Potatoes

Yesterday was a busy day for me.  It seemed like one minute it was 2 PM and the next minute it was dinner time.  I hadn't defrosted any meat, my fridge was bare, and it was too late to drive to town.  So, I decided to make breakfast potatoes.  This is a great meal for using up leftovers and it's delicious, but probably not great for heart-health.

I like to start with pre-cooked potatoes, as they brown faster and I'm done and can eat sooner.  Leftover baked or boiled are good, or you can bake them in the microwave.  Mine has a fancy "baked potato" button.  If you don't save a mug of rendered bacon grease, you might want to cook your bacon first.

Chop 1/2 to 1 large onion.

Heat a large skillet to medium heat.  Add a dollop of bacon grease or vegetable oil.

Add onions and salt liberally.  Once onions start to become translucent, you can add any vegetables you like.  I prefer carrots and broccoli or cabbage.  Saute until crisp-tender.  At this point I like to add halved grape tomatoes if I have them.  (I didn't last night.)


Once the vegetables are cooked to your desired doneness remove them from the pan to a bowl.

Add more bacon grease, a layer of cubed potatoes, more bacon grease, and plenty of salt.  Salt is really important in this dish.  If in doubt, eat a piece of potato while you're cooking to check the salt.  After a few minutes lift and turn the potatoes with a spatula.  Repeat until most of the potato pieces have a fair amount of golden crust on them.

This is what my children were doing while I was cooking dinner.  I gave them dried beans to play with.  Sometimes I wonder about myself.
When the potatoes are finished cooking add the veggies back in and warm for a minute.  This is also a nice time to add fresh chopped parsley or your herb of choice.  Serve with your condiments of choice, my family likes ketchup and tobasco sauce.  Some bacon or sausage, some fruit, and a glass of milk and you've got all your food groups.  Mmmm.

Thursday, February 18, 2010

Craft-y Curtains

I love a good project. I have lists upon lists for my projects. Some are of projects I'm going to do, some are ideas for projects I might do. Some are lists of supplies that I need for projects. Can you tell I like lists? But that's a different story for a different day. The project I'm showing you today is my solution to one of the eyesores in our home.

The partition between our kitchen and dining areas has these cupboards and shelves on the dining side. I imagine that they were intended to store dishes, table linens, and other sensible, attractive items. Now they mostly house a huge amount of art and craft supplies. It's a great location for the craft stuff because we usually sit at the table to do crafts. And, with them right there, the kids can get the crayons and coloring books or playdough out by themselves while I'm cooking or cleaning in the kitchen. A few cookbooks have found their way in there as well.

This is very convenient, but not super aesthetically appealing. This little area can become shockingly messy in a very short amount of time. So, I bought a little curtain rod. A long time ago. Maybe a year? I don't know how long ago, really, but it was long enough that my kids found it and played with it. By "played" I mean whacked each other with it and eventually bent it. No worries though, I just bent it back into a semi-straight shape again. It's one of those tension rods that works just like a shower curtain rod and it was really cheap.

Last month I was in JoAnn's and I found this fabric on sale for $3 per yard. Nice and cheap and it matched my dining room and kitchen mistreatments. I learned the idea of mistreating from Nester, and she has saved us big bucks on window treatments. So I bought a couple yards.
Dining room windows 


Coordinating(and cheap!) fabric


Finally, I sewed a couple of very simple curtains. I measured the opening and made two panels a couple inches taller and about the same width. I finished the hems. Then I sewed a small pocket along the tops, inserted the rod, and now have a much more serene dining room. And my sweeties can still easily access their art and craft supplies. A definite win-win!
Before

After

My sweet boy demonstrating the ease with which he can access the shelves. He's very helpful. 


Much better, no?


Linked to Transformation Thursday at:

The Shabby Chic Cottage

Saturday, February 13, 2010

Last-minute Valentine's Craft

My almost 4-year-old loves crafts. She wants to "play a craft" every day, at least. And, she's started saving everyday objects to use for these crafts. Recently, she chastised me for throwing away a Hello Kitty bandaid box because she'd been planning to use it for a craft when it was empty. She rescued it, painted it pink, and cut it up. I love seeing this creativity come from her and it's fascinating to see what she'll create.

When my paper towels ran out a couple weeks ago, I saved the tube and stuffed bread bags into it. It fits perfectly in my drawer and my supply of bags for fresh bread is much more orderly. Well, my girl wasn't pleased because she had planned on using it for a craft. Of course!  How could I not know that?! So, when the paper towels ran out again this week, I saved the tube. After a little pondering, this is the craft I came up with. It's loosely based on my (ahem, award-winning) valentine box from an oatmeal container that I made in gradeschool.

First, I cut the tube in half and had them paint it.  You could really use anything here; TP tubes, gift wrap, just plain old paper.  Also, this is a good time for a color lesson.  What colors make pink?  By the way, I love freezer paper.  It's cheap and lets me clean less.  Which makes me much more willing to do messy crafts.  Which makes my kids happy.  Which makes me happy.


And paint, paint, paint.  Very serious business!


Then we cut out a bunch of different sizes of hearts in different papers.  I drew half hearts on the fold for my girl to cut out.  My boy and I cut some out, too, using these teaching scissors.  Well, we cut out two or three, then he just cut up a bunch of paper.  We were both happy with that arrangement. 

They drew on the hearts with markers and glued them together, overlapping them so they looked like butterfly wings.  After they dried a bit, they glued the wings to the tubes, using plenty of glue.  I folded the freezer paper over and set them on the shiny side to dry so they wouldn't stick.

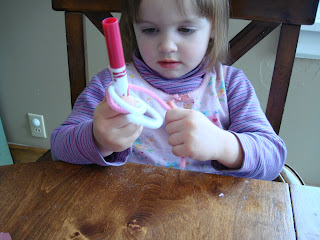
Now you have the basic butterfly shape and can embellish them as you please.  We added googly eyes.  We loooove googly eyes here. 

Then we curled pipe cleaners by twisting them around markers.  I poked a couple of holes near the top of the tubes with a toothpick and in went the antennae.

Pretty fancy!  And my sweeties were immensely happy.  They got to use paint, scissors, glue, googly eyes, and pipe cleaners!  A little glitter and they would have been in heaven, but I just didn't have it in me that day.  Those of you with little ones know what I mean.  Glitter can take a toll on a mama's sanity.

Happy Valentine's Day!

Tuesday, February 9, 2010

Chubby Tootsies

When your ankles look like this:
it can be difficult to keep on socks that don't turn your feet purple.  Purple feet make a mama sad.  So, when I stumbled on this tutorial, I knew what I had to do.  I've been a big fan of the leather soft-soled baby shoes since A was born, but not a big fan of the price tag.  C had a pair of those name brand shoes that baby T's been wearing, but they're starting to get a little snug.  I happend to have recently purchased this snail fabric with no project in mind, I just found it adorable.  And, I'd been hanging on to a yellow t-shirt of C's that looked like, well, like a 2 year old boy had been wearing it.  The stars aligned and these:
were the final result.  Soft little custom shoes that fit my baby's chubby ankles and keep his socks on.  They were an especially good project because I had been wanting to practice button holes.  I got some practice and no one can see them, perfect combination.  And yes, the elastic is pink.  It's all I had on hand.  I'll pick up some manly white elastic the next time I make it to the fabric store.
Cute, huh?
Even cuter!  And he now had warm and stylish little feet.  I feel another pair or three coming on... 
make it wear it
DIY Day @ ASPTL


Monday, February 8, 2010

Welcome!

I've been enjoying blogs as a reader for quite some time and finally decided to make the leap to author.  Meanwhile, back at the ranch... is intended as a place to share my life and creations, both human and domestic, with our friends and family.  And anyone else who may be interested. 


My children are endlessly amusing and amazing.  They have taught me more than I thought I could learn about life and myself.  And they have changed me for the better.  Because of them, I am more patient and tolerant, more creative and verbal.


I have always loved all things domestic.  Well, except maybe a few of the more tedious chores.  Folding laundry?  Bleh.  I remember reading Better Homes and Gardens and Good Housekeeping from about the 3rd grade on.  I had my own subscription to Bon Appetit at the ripe old age of 15.  I've always loved cooking and find baking downright therapeutic.  My dear Grandma Kelly taught me to crochet as a child, and I've just recently picked up sewing.  I also have a garden, and am enjoying sharing it with my children.


I hope you find something here that amuses or inspires  you.  Happy reading!

LinkWithin

Related Posts with Thumbnails